These sample Mission Plans cover various aspects of FreeFlyer's ability to interface with other programs and data sources. After exploring the Mission Plans below, continue to the Interfacing with External Resources Guide to learn more.
Note: For Mission Plans that generate a batch file, you do not need to use a Mission Plan to create that batch file. This approach was used for these examples so that the batch files would reflect each user's FreeFlyer installation directory. You can create a batch file manually by following the instructions in the Creating a Batch File article.
Jump to a Mission Plan Description:
Mission Plan |
Engineer |
Mission |
• |
• |
|
• |
• |
|
• |
• |
|
• |
• |
|
• |
• |
|
• |
• |
|
• |
• |
|
• |
• |
|
• |
• |
|
• |
• |
|
• |
• |
|
• |
• |
|
• |
• |
|
• |
• |
|
• |
• |
|
• |
• |
|
|
• |
|
• |
• |
|
• |
• |
|
• |
• |
|
• |
• |
|
• |
• |
|
• |
• |
|
• |
• |
Client Socket
This Mission Plan demonstrates the use of FreeFlyer to send and receive data through a Socket Interface. There are two Mission Plans associated with this example, a Server and a Client. This Mission Plan is the Client, and has a Socket called ClientSocket that will be used to send and receive data from the Server.
The Mission Plan propagates a Spacecraft, and sends the SMA, Eccentricity, and Inclination to the Server through the Socket. It then waits to receive manipulated data from the Server through the Socket. Once this Mission Plan receives the manipulated data from the Server, it reports the data to the screen and steps the Spacecraft to the next propagation step.
To learn more about topics related to this sample Mission Plan, see the Sockets guide.
Create Auto Pass User Info Batch Files
This Mission Plan creates two batch files that execute a FreeFlyer Mission Plan. The first batch file, 'BatchFile_FF_NoGUI.bat', will call FF.exe, the no-GUI mode that runs only in the command line. The second batch file, 'BatchFile_FreeFlyer_GUI.bat', will call FreeFlyer.exe, the GUI mode of FreeFlyer. Both batch files will run the Auto Pass User Info Sample Mission Plan.
After running this Mission Plan, open the _Output_Files directory in an explorer window and launch each batch file.
Auto Pass User Info
This Mission Plan is supposed to be kicked off by a batch file that passes information via the '-ui' command. The batch file is created by the CreateAutoPassUserInfoBatchFiles Sample Mission Plan in the Interfacing with External Resources folder. This Mission Plan propagates a Spacecraft, given the parameters that were sent to FreeFlyer via the '-ui' command. While propagating, the Mission Plan generates a report of the contact times between the Spacecraft and the Groundstation. This Mission Plan is located in the _Support_Files/MissionPlans directory.
Note: If this Mission Plan is run without the batch file, an error message will be displayed.
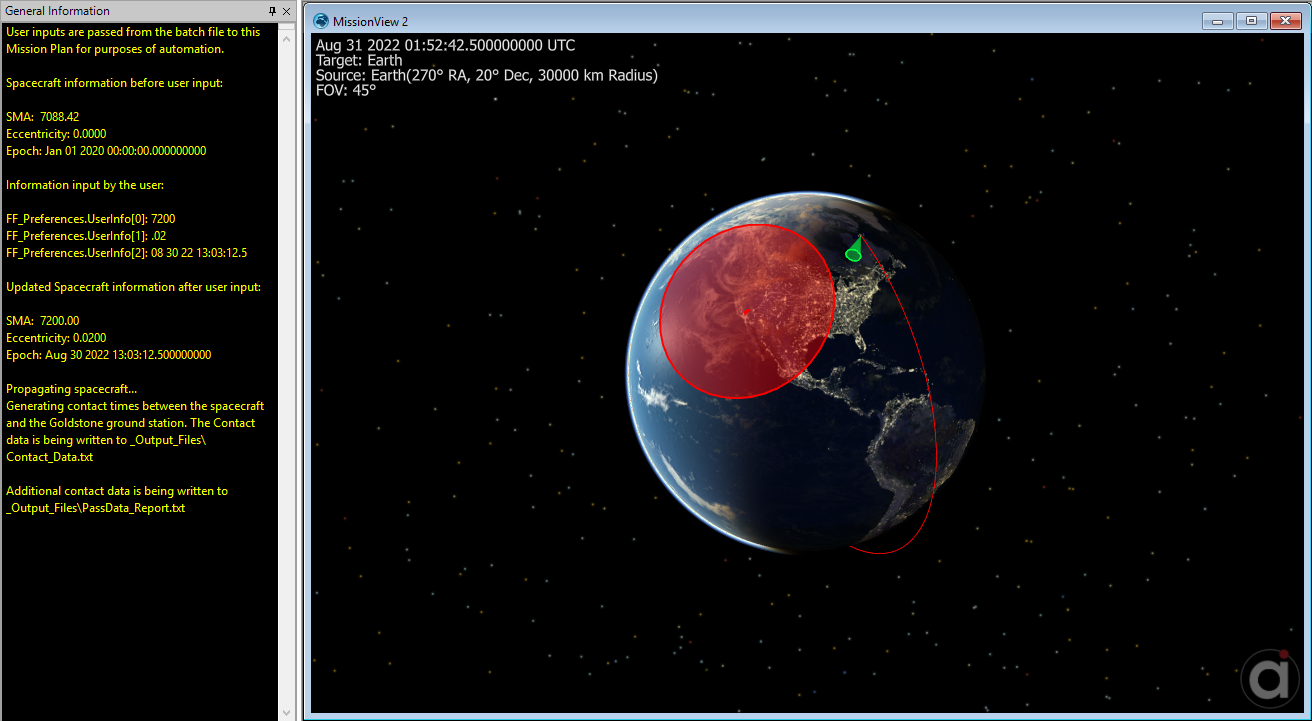
AutoPassUserInfo Sample Mission Plan output.
Create List/Loop Batch Files
This Mission Plan creates two batch files that executes a list or a looping list of FreeFlyer Mission Plans. The first batch file, 'BatchFile_FreeFlyer_GUI.bat', will call FreeFlyer.exe, the GUI mode of FreeFlyer. The second batch file, 'BatchFile_FF_NoGUI.bat', will call FF.exe, the no-GUI mode that runs only at the command line.
After running this Mission Plan, open the _Output_Files directory in an explorer window and launch each batch file.
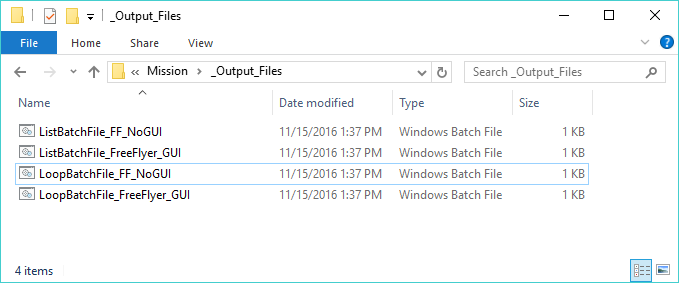
This window shows the batch files that will be created when you run the Mission Plans. Run each batch file to observe the automated List/Loop operation of FreeFlyer.
Create Movie Generation Batch Files
This Mission Plan creates five batch files that each generate one or more movies using the FreeFlyer Mission Plan MovieViews found in the _Support_Files/MissionPlans directory.
The batch files are named:
•BatchFile_CreateMovie.bat •BatchFile_CreateMovie_CustomFormat.bat •BatchFile_CreateMovie_Using2Windows.bat •BatchFile_CreateMovie_UsingOptionsFile.bat •BatchFile_CreateMovies_UsingRenderQueue.bat |
After running this Mission Plan, open the _Output_Files directory in an explorer window and launch each batch file. Then, run each of the movies that have been created.
For more information on generating movies in FreeFlyer, see the Generating Movies page under the Generating Output Guide.
Movie Views
This Mission Plan propagates a Spacecraft and displays two ViewWindows with the titles "Spacecraft View" and "MissionView 1". These ViewWindows are accessed by the batch files created by the CreateMovieGeneratingBatchFiles Mission Plan so that various movies can be created, exercising the available command line options. This Mission Plan is located in the _Support_Files/MissionPlans directory.
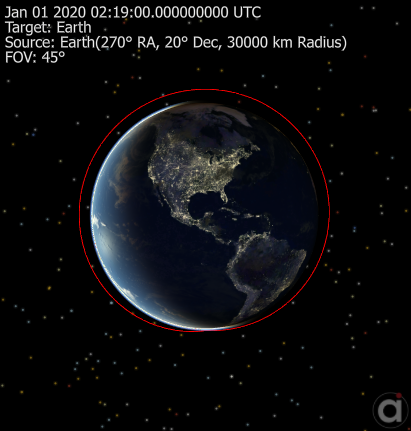
Wide view of a Spacecraft orbiting the Earth
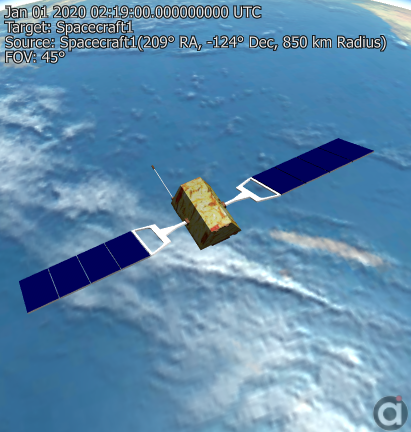
Close up view of the Spacecraft
Create Namelist Batch Files
This Mission Plan creates two batch files that execute the Walker Constellation Sample Mission Plan. The first batch file, 'BatchFile_Create_Namelist.bat', calls the Mission Plan and creates a output file of your UserInterface selections. The second batch file, 'BatchFile_Import_Namelist.bat', calls the Mission Plan and uses a namelist input file provided in the _Support_Files directory to override the UserInterface.
After running this Mission Plan, open the _Output_Files directory in an explorer window and launch each batch file.
To learn more about topics related to this sample Mission Plan, see the Using Namelists section of the Custom User Interfaces Guide.
Download TLEs
This Mission Plan demonstrates the Socket object as an interface to a website. The socket connects to www.celestrak.com.First the socket is used to download the source from the websites homepage. The source is used to build a list of all the TLE sets available on CelesTrak. This list is then presented through a UserInterface object allowing the user to select which TLEs to download. Once a TLE set is selected FreeFlyer sends a "Get" command to the Celestrak website, and receives a string of TLE data which is parsed into a StringArray object. The TLE file is saved, and then loaded into a formation object to be visualized in a 3D Mission View.
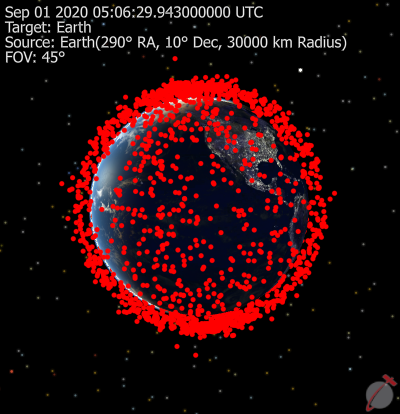
Fengyun 1C Debris visualized through the Download TLE's Mission Plan on August 31, 2020
To learn more about topics related to this sample Mission Plan, see the Sockets and Lists and Formations guides.
Excel File Interface
This Mission Plan demonstrates the use of FreeFlyer to read a randomly-formatted external file. In this case, the pre-generated external file contains ephemeris data (epoch, position, and velocity) for a Moon-orbiting Spacecraft.
The data in the external file is comma-separated (CSV). A FileInterface object is used to read the file and assign each state to a Spacecraft. The Spacecraft is propagated until the end of the CSV file is reached. A new FreeFlyer-formatted ephemeris file is generated at the end of the Mission Plan.
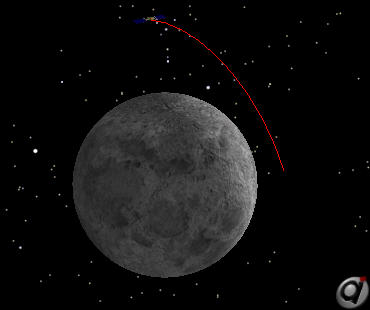
Moon-orbiting Spacecraft
To learn more about topics related to this sample Mission Plan, see the Interfacing with External Files guide.
FileInterface - ASCII
This Mission Plan retrieves unmodeled acceleration data from a randomly formatted external file. The data shown in the WatchWindow matches the acceleration values read from the external file 'UnmodAccel.txt'. This shows that those values are now associated with the Force Model's Unmodeled Accelerations.
To learn more about topics related to this sample Mission Plan, see the Interfacing with External Files guide.
FileInterface - Binary
This Mission Plan demonstrates the use of the FreeFlyer FileInterface object to read in data from a binary data file. In this example, selected integer and double data is extracted from the binary data and displayed. The data file used is a TDRSS Universal Tracking Data Format (UTDF) file. A UTDF file is the standard file format used by the Space Network (TDRSS) to communicate TDRS tracking data to its customers.
As a general rule, the extraction of binary data requires a priori knowledge of the file format. For this example, the UTDF file format is detailed in the Space Network - Flight Dynamics Facility Interface Control Document. For the purposes of this Mission Plan, the locations of the data elements extracted from the UTDF file are detailed in the "Relevant UTDF Format Description" window. After execution of this Mission Plan is complete, this window can be found minimized at the bottom of the output screen.
To learn more about topics related to this sample Mission Plan, see the Interfacing with External Files guide.
MatlabInterface - Cubic Spline
This Mission Plan demonstrates the use of FreeFlyer to interface with Matlab and use Matlab's cubic spline interpolation to calculate and plot a set of data. The exact value of the measured Y-data will be returned if a corresponding X-value is input.
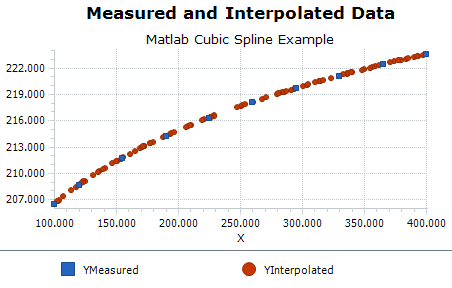
Plot of actual measurement data (blue) and 100 interpolated data points using random inputs (red)
The script in this example can be used as a template for interfacing with other Matlab functions. The Matlab m-file is very simple as well, requiring only two lines:
ss = spline(Xarray, Yarray) YInterpolated = ppval(ss, X) |
To learn more about topics related to this sample Mission Plan, see the Matlab Interface guide.
MatlabInterface - Force Model Example
This Mission Plan demonstrates the different Atmospheric Model representations available in FreeFlyer. Four spacecraft are created with different Atmospheric Force Models. The Analytic Spacecraft uses the Analytic Force Model, HP75 uses Harris-Priester 75 model, Jacchia uses Jacchia-Roberts model, and the CustomFM uses a custom Force Model calculated in Matlab. The custom Force Model is enabled using the ForceModel.UseOtherAcceleration property, and is defined through FreeForm.
In order to calculate the custom accelerations, 7 properties of CustomFM spacecraft are sent to Matlab, using a Matlab Interface called MatlabInterface1. These seven properties are Cd, DragArea, SRPArea, VX, VY, VZ, and NewMass of the CustomFM spacecraft. NewMass is calculated as a 0.3% loss of fuel. Matlab takes this data and calculates the UX, UY, and UZ components of the unmodeled acceleration, and sends the output back to FreeFlyer through the CustomDragAccelerations array. FreeFlyer takes these array elements and applies them to the UX, UY, and UZ components of the Force Model of the CustomFM spacecraft.
The 3D View shows the orbit of each spacecraft with respect to the Analytic Spacecraft. The Plots show Range for each spacecraft from the Analytic Spacecraft.
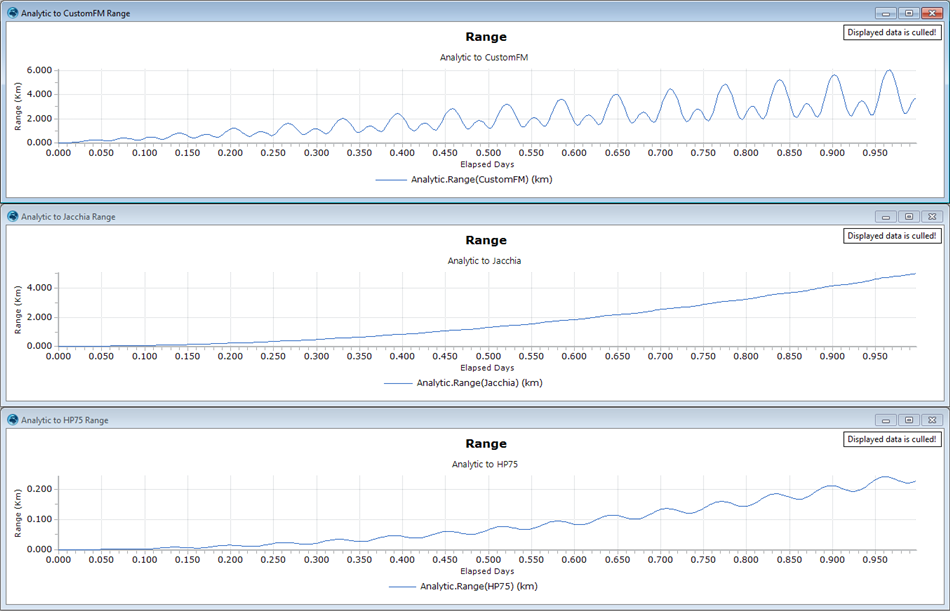
Range plots for each spacecraft from the Analytic Spacecraft
To learn more about topics related to this sample Mission Plan, see the Matlab Interface guide and the Force Modeling reference.
MatlabInterface - Simple Calculation
This Mission Plan calls a Matlab .m file which performs a simple calculation on an Array, a Matrix, a String, a StringArray, and a Variable. The Mission Plan demonstrates how to interact with Matlab through FreeFlyer's object and commands editors as well as FreeForm script editors.
To learn more about topics related to this sample Mission Plan, see the Matlab Interface guide.
MatlabInterface - Socket Connection
This Mission Plan demonstrates how a user could use the Socket Object in FreeFlyer to communicate with Matlab over a socket interface. This code represents the CLIENT socket. It receives data from Matlab, does 'something' with that data, and then returns the results back to Matlab. This Mission Plan is meant to be called from Matlab. To see the full example, run the SimpleSocket.m script in Matlab. Be sure to set the FreeFlyer install path as well as the Mission Plan location in the Matlab script.
To learn more about topics related to this sample Mission Plan, see the Matlab Interface guide and the Socket guide.
MatlabInterface - User Function
This Mission Plan demonstrates how to request and plot a custom function calculated in Matlab. The user inputs a one-variable function as a string in Matlab format with a desired range and the number of data points. The (x,y) data will be output to arrays and plotted.
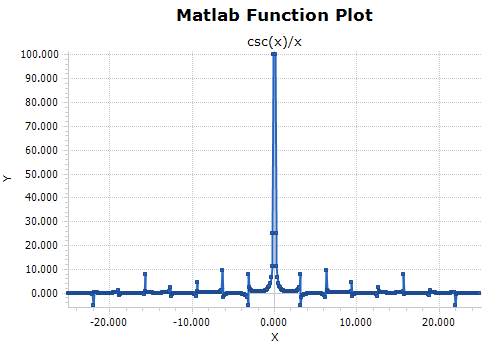
Plot of Y = csc(x)/x
This allows users to quickly set up arrays containing the desired output and provides access to Matlab math functions that are not built in to FreeFlyer. The Matlab m-file used by this example is very simple, requiring only five lines:
G = inline(strtrim(F)) for i=1:N+1 Xout(i) = ((i-1)*(Xmax-Xmin)/N) + Xmin; Yout(i) = G(Xout(i)); end |
To learn more about topics related to this sample Mission Plan, see the Matlab Interface guide.
Run Command
This Mission Plan demonstrates the use of the FreeFlyer Run command. The Spacecraft is propagated for one day when this Mission Plan is run from the GUI, generating an ephemeris file. This Mission Plan then kicks off an instance of command line FreeFlyer which analyzes the Ephemeris and reports some diagnostic information about it to standard output.
Server Socket
This Mission Plan demonstrates the use of FreeFlyer to send and receive data through a Socket Interface. There are two Mission Plans associated with this example, a Server and a Client. This Mission Plan is the Server, and has a Socket called ServerSocket that is awaiting data from the Client.
Once this Mission Plan receives the data, it edits the data and sends it back to the Client.
To learn more about topics related to this sample Mission Plan, see the Sockets guide.
UserInterface - Navigation Type
This Mission Plan demonstrates the User Interface property "NavigationType", which controls how the user accesses the pages of a UserInterface. NavigationType has two valid values: "Ordered Access" and "Random Access". The default is "Ordered Access", in which the pages are shown sequentially with "Next Page" and "Previous Page" buttons. With "Random Access", the user navigates the pages using a list of available pages shown in a panel on the left side of the UI.
In this example, two Spacecraft Objects are modified through two separate UserInterfaces. The UserInterface "OrderedUI" is created through FreeForm script, and it displays three pages in Ordered Access. The UserInterface "RandomUI" is created through the Object Browser, and it displays the same input options using Random Access.
This Mission Plan exercises the following UserInterface entry types:
•Variable Text Entry •String Text Entry •Drop-Down Menu •Radio Buttons |

Ordered-Access User Interface

Random-Access User Interface
To learn more about topics related to this sample Mission Plan, see the User Interfaces guide.
UserInterface - Script Example
This Mission Plan demonstrates how to create a UserInterface in script. The User Interface allows the user to configure a Ground Station created in FreeForm Script. The User Interface has three pages. The first page allows the user to edit the location and name of the Ground Station, the second page allows the user to control the visualization properties of the Ground Station and the third page allows the user to set some of the Ground Station Orbit Determination properties.
See the User Interfaces guide for more information on creating User Interface.
UserInterface - Spacecraft Orbit
This Mission Plan demonstrates the use of a UserInterface. The UI is a custom-designed panel or series of panels allowing the user to input key data for that specific Mission Plan. A User Interface provides a simple, focused input mechanism for a limited scope of input data. This device can be especially helpful to users with limited experience or where the same procedure is to be run many times. Data entered in the UI overrides corresponding data in the Mission Plan.
The User Interface is displayed via the Show command.
To learn more about topics related to this sample Mission Plan, see the User Interfaces guide.
UserInterface - String Input
This Mission Plan demonstrates how to receive string-based data from a UserInterface and assign the input to FreeFlyer String objects. The results of the User Interface are reported out to the Console.
To learn more about topics related to this sample Mission Plan, see the User Interfaces guide.
Using Externals
This Mission Plan uses external script files, known as Procedures, to execute generalized sections of FreeFlyer script. The Call command is used to execute the desired Procedure or Macro.
The orientSC Procedure sets a Spacecraft's attitude so that it is pointing toward the sun if in sunlight and aligned with the LVLH frame if in shadow. This Procedure calls a second Procedure, sunpoint, to calculate the normalized vector pointing from the Spacecraft to the Sun in the Spacecraft LVLH frame. A Macro called StepMacro is used to step the Spacecraft forward in time.
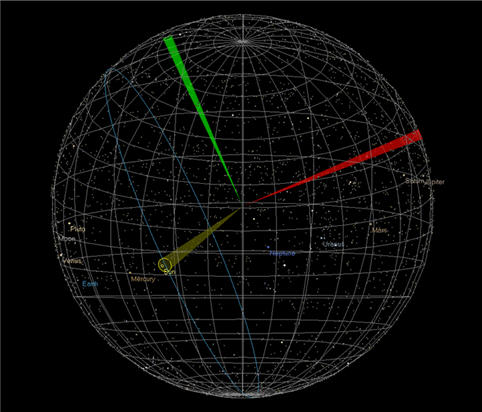
Sun-pointing Spacecraft Attitude viewed in the Celestial Sphere View Mode
To learn more about topics related to this sample Mission Plan, see the Using Procedures reference.
Using Globals
This Mission Plan demonstrates the use of the Externals Browser to include a file with a Global Variable 'GlobalNumber'. 'GlobalNumber' is available to the Mission Plan as well as to the Example.FFProcedure (also in the Externals browser) without having to be passed as an argument to the Procedure.
'GlobalNumber' and another variable in the Mission Plan, 'Number', are displayed, then sent to the Procedure, which sums them, and then are displayed again.
To learn more about topics related to this sample Mission Plan, see the Constant and Global Keywords section of the Working with Objects Guide.