FreeFlyer can generate movies of any 2D or 3D Mission View. There are two approaches to creating movies:
The following Sample Mission Plans (included with your FreeFlyer installation) demonstrate movie generation:
|
Via the "Render a Movie" Button
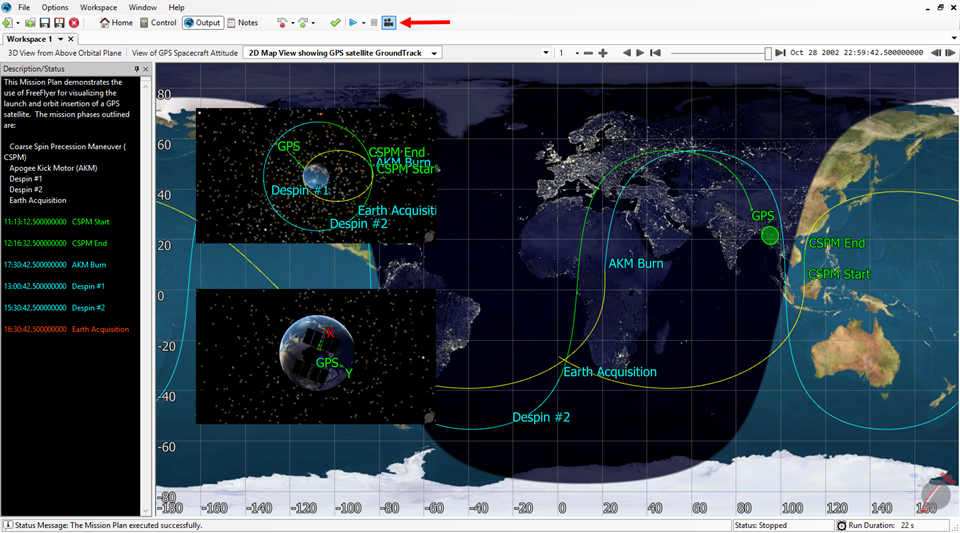
After a Mission Plan has stopped execution, the user is given the option to render a movie of one of the output windows in the workspace using the "Render a Movie" button located next to the "Stop" button.
Note that in order to control the perspective of the "camera" used to create the movie, you must use FreeFlyer script to set the desired view. As shown in the syntax example below, ViewWindow.InstantaneousCameraRadius, InstantaneousCameraRA, and InstantaneousCameraDec are the primary properties used to adjust the view during the Mission Sequence. Manipulating the output view with the mouse will not have an effect on the movie.
ViewWindow1.InstantaneousCameraRA = (ViewWindow1.InstantaneousCameraRA + 4.5)%360; ViewWindow1.InstantaneousCameraDec = (ViewWindow1.InstantaneousCameraDec + 0.3)%360;
If (ViewWindow1.InstantaneousCameraRadius > 100); ViewWindow1.InstantaneousCameraRadius = ViewWindow1.InstantaneousCameraRadius - 100; End; |
When the "Render a Movie" button is selected, the "Create a Movie" dialog will be shown. From this screen, you can set the following properties for the movie:
1.Available Window(s) - Choose a window from the list. Each 2D or 3D view will be shown, along with the number of frames and duration of the clip. After a movie is generated, this dialog will be shown again, allowing you to generate multiple movies from each view. 2.File Title - Choose a title for the movie file. 3.Directory - Specify an output path relative to the Mission Plan location. 4.Width and Height - Specify the resolution of the movie in pixels. The uncompressed size calculation will update based on these values. 5.Format - Choose whether to generate a .AVI or .WMV (default). 6.Codec - A listing of available 64-bit codecs depends on which codecs are installed on the machine running FreeFlyer. 7.Key Frame Spacing •The key frame is a frame in which a complete image is stored in the data stream. Subsequent frames store 'deltas' or changes from the initial key frame until the next key frame is encountered. Storing the deltas instead of the whole image at these frames greatly reduces the amount of data that needs to be stored, thus reducing the file size. •A longer key frame spacing results in a smaller movie file, however seeking through the movie will take additional time since the deltas need to be applied after each key frame. A shorter key frame spacing results in faster seek times, however the movie file will be much larger. •Most movies will have small changes from one frame to the next, thus a larger key frame spacing is acceptable. For movies with more transitions (i.e larger changes from one frame to another), a smaller key frame spacing is recommended. 8. Quality - The quality of the final movie where 1 means poor quality and 100 means greatest quality. 9. Data Rate - Specify whether or not to use a constant bit rate, and set the constant rate.
Note: Some properties may not be available depending on the file format and codec type.
 "Create a Movie" dialog for AVI movies
 "Create a Movie" dialog for WMV movies
|
Note: If 20% of the maximum storage space is not available, then movie generation will automatically be disabled. See the Controls section of the User Preferences page for details.
Via the Command Line
You can generate movies of FreeFlyer output windows from the command line, as well. The following command line switches (available to the "FreeFlyer.exe" executable) relate to movie generation:
"Create Bitmap Movie" and "Bitmap Movie Window" Switches
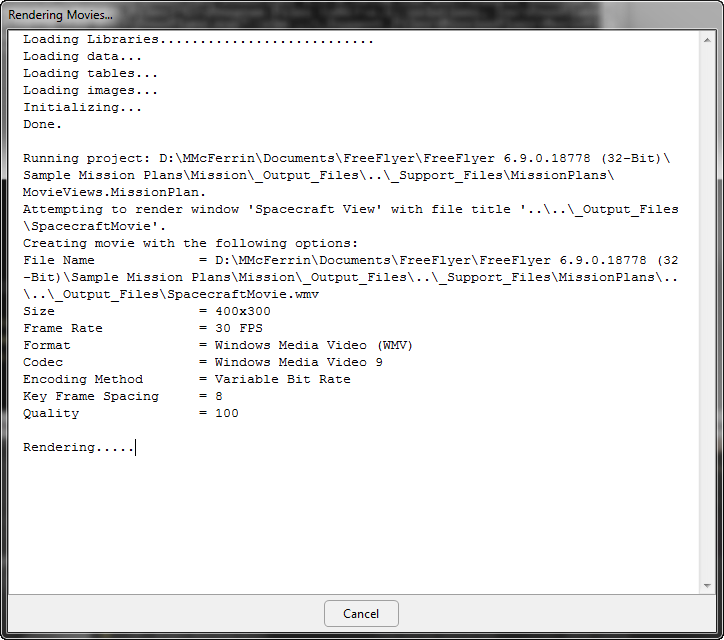
When generating movies from the command line, the -cbm (Create Bitmap Movie) switch is used to specify the desired Mission Plan, instead of the usual -mp switch. The -mp switch is used to specify the desired Mission Plan in all command line applications other than movie generation. When the -cbm option is specified, the regular FreeFlyer interface will not appear. Instead, you will see a dialog detailing the activity of the process, as seen below.
The -cbm switch should be used with the -bmw (Bitmap Movie Window) switch, which has two input arguments. The first input argument to the -bmw switch specifies the title of the output window to be rendered, and maps to the ViewWindow.WindowTitle property. If the WindowTitle has not been set, the default value of "MissionView 1" should be used. The second input argument specifies the output filename for the movie.
The syntax for creating a movie from the command line is shown below. Note that:
•The Mission Plan is called "SpacecraftView.MissionPlan" •The Window Title is "Spacecraft View" •The output filename is "SpacecraftMovie1.wmv" |
"C:\Program Files\a.i. solutions, Inc\FreeFlyer 6.6.0.8591\FreeFlyer.exe" -cbm "MovieViews.MissionPlan" -bmw "Spacecraft View" "SpacecraftMovie" -bmsl "Log_CreateMovie1.txt" |
In this example, the ViewWindow has the default window title:
"C:\Program Files\a.i. solutions, Inc\FreeFlyer 6.6.0.8591\FreeFlyer.exe" -cbm "MovieViews.MissionPlan" -bmw "MissionView 1" "EarthMovie1" -bmsl "Log_CreateMovie2.txt" |
Note: If a Mission Plan contains multiple ViewWindows with the default title, the identifying number will be incremented: "MissionView 2", "MissionView 3", etc....
Formatting Switches
The following switches can be used to adjust the format of the movie:
•-bmfr - Sets the frame rate of the movie •-bmop - Sets the output path of the movie file •-bmr - Sets the resolution of the movie |
The following syntax example shows how to generate a movie with a frame rate of 30 seconds and a resolution of 600 x 450, and output the movie to the user's Desktop.
"C:\Program Files\a.i. solutions, Inc\FreeFlyer 6.6.0.8591\FreeFlyer.exe" -cbm "MovieViews.MissionPlan" -bmr 600 450 -bmfr 30 -bmop "C:\Documents and Settings\sfields\Desktop" -bmw "Spacecraft View" "SpacecraftMovie_CustomFormat" -bmsl "Log_CreateMovie_CustomFormat.txt" |
Creating Multiple Movies
It is possible to generate multiple movies from the command line with a single command or batch file. You can the specify following switches multiple times in order to change the format options for each movie. When the -bmw switch is encountered, the last specified format options will be used.
The following syntax example shows how to generate two movies with different frame rates and resolutions. The first movie shows a ViewWindow with the title "Spacecraft View", and the second movie shows a ViewWindow with the default title of "MissionView 1". The text is color-coded to make the example easier to read: red text corresponds to the first movie, and green text corresponds to the second movie.
"C:\Program Files\a.i. solutions, Inc\FreeFlyer 6.6.0.8591\FreeFlyer.exe" -cbm "MovieViews.MissionPlan" -bmr 400 300 -bmfr 30 -bmw "Spacecraft View" "SpacecraftMovie_Using2Windows" -bmr 600 450 -bmfr 15 -bmw "MissionView 1" "EarthMovie_Using2Windows" -bmsl "Log_CreateMovies_Using2Windows.txt" |
When rendering multiple movies, the progress dialog will show status updates as each movie is generated:

Options File
You can use the Export Settings button in the "Create a Movie" interface shown above to generate a movie options file. This file will be saved with the extension ".FFMovieSettings", and will contain data in the following format:
Sample "WMVsettings.FFMovieSettings" file:
<?xml version="1.0"?> <MovieSettings xmlns:xsi="http://www.w3.org/2001/XMLSchema-instance" xmlns:xsd="http://www.w3.org/2001/XMLSchema"> <Directory>.\</Directory> <FileTitle>Movie</FileTitle> <Width>400</Width> <Height>300</Height> <FrameRate>30</FrameRate> <LaunchMovie>true</LaunchMovie> <Format>Windows Media Video (WMV)</Format> <Codec>Windows Media Video 9</Codec> <Quality>100</Quality> <DataRate>5000</DataRate> <KeyFrameSpacing>8</KeyFrameSpacing> <WMVUseVBR>true</WMVUseVBR> <UseAVIKeyFrame>false</UseAVIKeyFrame> <UseAVIDataRate>false</UseAVIDataRate> <AVICodecData /> </MovieSettings> |
The data in this file defines the output path, file name, resolution, and frame rate of the movie, and can be used with the -bmof switch when generating movies from the command line. Once an options file has been created using the Export Settings button, you can edit the file in a text editing program such as Notepad in order to define different settings. The syntax for using a movie options file when generating a movie at the command line is:
"C:\Program Files\a.i. solutions, Inc\FreeFlyer 6.6.0.8591\FreeFlyer.exe" -cbm "MovieViews.MissionPlan" -bmof "WMVsettings.FFMovieSettings" -bmw "Spacecraft View" "SpacecraftMovie_UsingOptionsFile" -bmsl "Log_CreateMovie_UsingOptionsFile.txt" |
Render Queue
The -bmrq (Bitmap Movie Render Queue) switch allows you to specify all the command line options for generating a movie in a file called a render queue. A sample render queue is shown below.
<?xml version="1.0" encoding="utf-8"?> <RenderQueue xmlns:xsi="http://www.w3.org/2001/XMLSchema-instance" xmlns:xsd="http://www.w3.org/2001/XMLSchema"> <MissionPlan>MovieViews.MissionPlan</MissionPlan> <SaveLog>Log_CreateMovie_UsingRenderQueue.txt</SaveLog> <BitmapMovies> <FileTitle>SpacecraftMovie_UsingRenderQueue</FileTitle> <WindowTitle>Spacecraft View</WindowTitle> <FrameRate>30</FrameRate> <Resolution> <Height>300</Height> <Width>400</Width> </Resolution> <OutputPath></OutputPath> <OptionsFile /> </BitmapMovies> <BitmapMovies> <FileTitle>EarthMovie_UsingRenderQueue</FileTitle> <WindowTitle>MissionView 1</WindowTitle> <FrameRate>30</FrameRate> <Resolution> <Height>600</Height> <Width>400</Width> </Resolution> <OutputPath></OutputPath> <OptionsFile /> </BitmapMovies> </RenderQueue> |
When this switch is used, the command or batch file is very simple and uses only one switch:
"C:\Program Files\a.i. solutions, Inc\FreeFlyer 6.6.0.8591\FreeFlyer.exe" -bmrq "RenderQueue.xml" |
Save Log
You can generate a log of the movie generation progress using the -bmsl switch. It is highly recommended to use this feature in order to easily identify why movie generation may have failed. The save log of a successful movie generation will contain the same information as that shown above in the "Rendering Movies" windows.
The syntax for creating a movie and a save log is shown below.
"C:\Program Files\a.i. solutions, Inc\FreeFlyer 6.6.0.8591\FreeFlyer.exe" -cbm "MovieViews.MissionPlan" -bmw "MissionView 6" "EarthMovie_SaveLog" -bmsl "Log.txt" |
Common error messages written to the save log include:
Attempting to render window 'MissionView 6' with file title 'EarthMovie'. Error: Couldn't find a window with the specified title. |
Attempting to render window 'Spacecraft View' with file title 'SpacecraftMovie'. Error: The file 'SpacecraftMovie.wmv' is currently locked by another application. This can happen when the movie is open in a movie viewer, or if the file is selected in Windows Explorer and a preview window is showing its contents. |