This section provides an introduction to the four different work areas that make up the FreeFlyer interface. The four different screens are as follows.
A launch point for exploring FreeFlyer and performing common tasks |
|
The editor used to configure your analysis |
|
The area where visual output is presented |
|
A place to capture notes about your analysis |
Home Screen
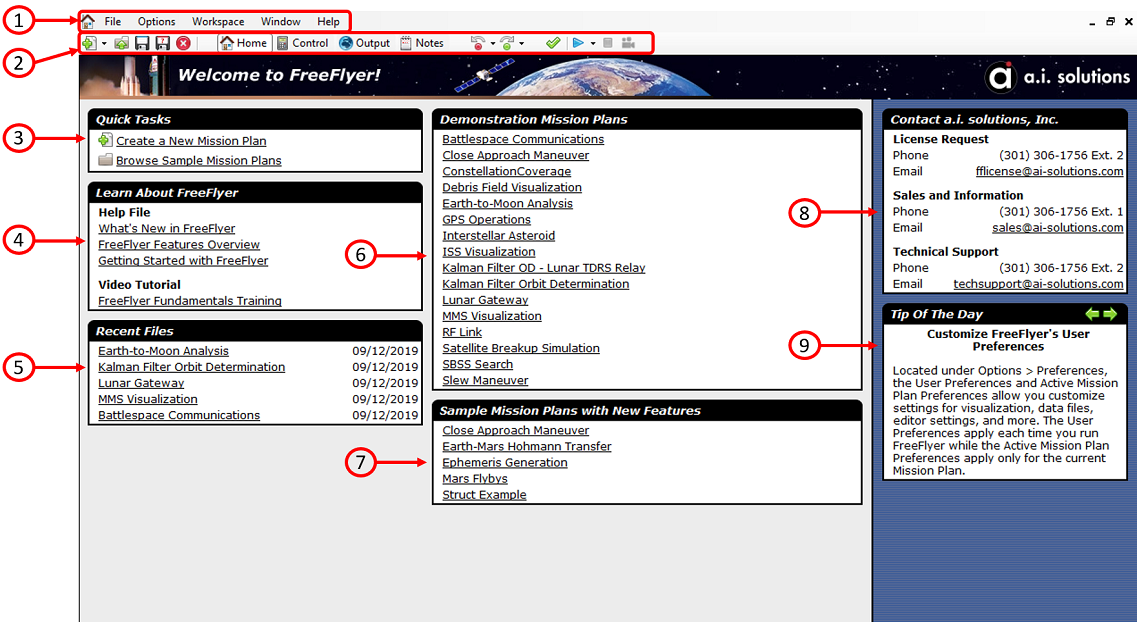
The Home Screen can be configured by using Widgets and defining the Layout of the page. For more information, see the Home Screen guide in the User Preferences section. By default, the Home Screen is broken up into ten sections.

The FreeFlyer Home Screen
1.Menu Bar
•File oNew Nanosecond Mission Plan oNew Millisecond Mission Plan oOpen oSave oSave As oClose Mission Plan oRecent Mission Plans oExit |
•Options oPreferences ▪Active Mission Plan Preferences oDefault Mission Plan ▪Load Default Mission Plan ▪Set Mission Plan As Default |
oCreate oCreate As oRename Selected oClose Selected oClose All oClose All But Selected oCascade Selected oTile Selected Vertical oTile Selected Horizontal |
•Window oCascade oTile Horizontal oTile Vertical oReset Docking |
•Help oShow Help Contents oView Error Log oView Extensions Log ▪Register New License ▪Downgrade/Restore License Tier ▪View Current License oAbout FreeFlyer |
2.Navigation Bar
•See description under the Control Screen section |
3.Quick Tasks
•Create a New Mission Plan •Browse Sample Mission Plans: Allows you to navigate through the vast library of sample Mission Plans that are included with FreeFlyer. The sample Mission Plans are located in the "Sample Mission Plans" folder in the FreeFlyer installation directory. |
4.Learn about FreeFlyer
•Help File oWhat's New in FreeFlyer: Describes new functionality included in the current release oFreeFlyer Features Overview: Provides an overview of the various capabilities available in FreeFlyer oGetting Started with FreeFlyer: Walks you through creating your first Mission Plan •Video Tutorial oVideo demos on the a.i. solutions, Inc. Youtube channel provide an introduction to the fundamentals of working in FreeFlyer |
5.Recent Files
•Presents a list of files that have been opened recently |
6.Demonstration Mission Plans
•Mission Plans which highlight various FreeFlyer functionalities •Console window commentary describes the flow of a Mission Plan as it executes. |
7.Sample Mission Plans with New Features
•Mission Plans which highlight new FreeFlyer functionalities implemented in a recent release. |
8.Contact a.i. solutions
•License Request •Sales and Information •Technical Support |
9.Tip of the Day
•Provides a random tip regarding the functionality in FreeFlyer |
Control Screen
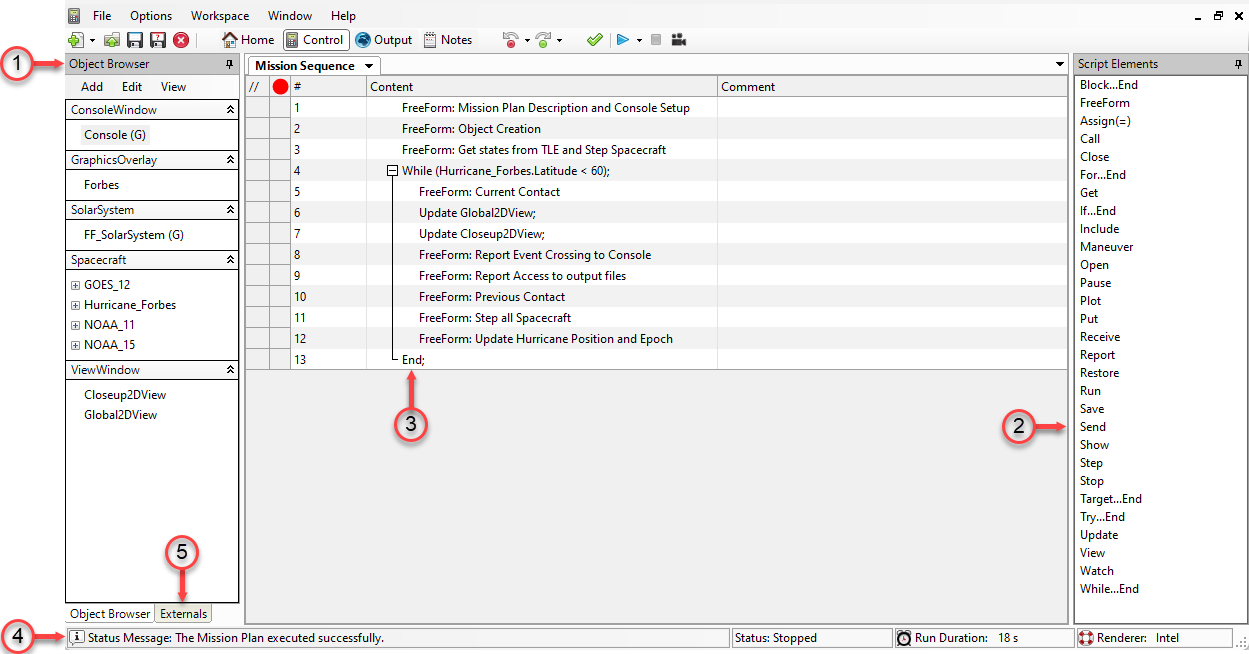
The Control Screen is segmented into five sections.

The FreeFlyer Control Screen
1.Object Browser
•Start here when creating a new Mission Plan •Allows you to create and manipulate objects by using the built-in editor dialogs •Add, Edit and View menus •Complete list of FreeFlyer Objects •See also Object Browser Shortcuts in the Appendix |
2.Script Elements
•Includes commands and flow control elements •After creating objects, drag and drop Script Elements into the Mission Sequence panel |
•Combines Objects with Script Elements to form FreeFlyer Script •Can include FreeForm script blocks; see Syntax and the FreeForm Script Editor •Divided into columns: Comment Out (//), Set Breakpoints, Line Number, Content, Comments oFor more on Breakpoints, see Using the Debugger oTo enter a comment, left-click or press F2 and start typing; to edit, highlight the field and press F2 •See also Mission Sequence Shortcuts in the Appendix |
4.Status Bar
•Mission Plan execution status (i.e. The Mission Plan executed successfully) •Mission Plan operation status (i.e. Running, Stopped, etc...) •Run Duration (in seconds) •Renderer (i.e. Intel, NVIDIA, Software, etc...); see Mission View Rendering Options |
•Provides the Mission Plan access to the contents of external files •Add externals through the "Manage" menu •Includes the ability to syntax check the contents of external files •See also Externals Browser Shortcuts in the Appendix |
The Navigation Bar displays the following options (from left to right):
•Create New Project oThere is a down arrow next to the icon that allows you to choose between millisecond precision mode and nanosecond precision mode. •Open a Project •Save •Save as •Close •Home, Control, Output, and Notes Screen selectors •Undo oThis allows you to undo changes that you made in the GUI. •Redo oThis allows you to redo a change that you previously removed using the Undo functionality. •Syntax check •Run/Pause oWhile a Mission Plan is running, this will be a Pause button •Stop •Export a Movie oSee Generating Movies page for more information. |
Output Screen
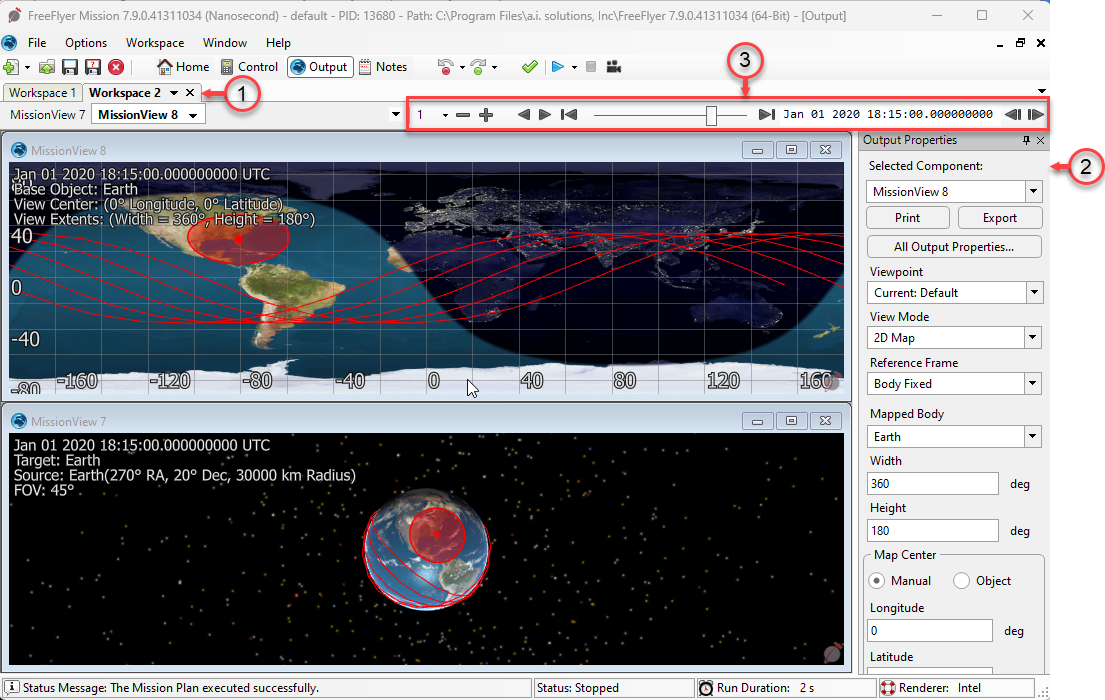
The Output screen contains all output windows (such as PlotWindow objects, ViewWindow objects, and WatchWindow objects) generated by a Mission Plan. There are many convenient shortcuts available for use within this screen as well.

The FreeFlyer Output Screen
1.Workspaces
•By default, each workspace contains the output of a single run •Easily compare output from different runs by switching between workspaces •Use the More menu associated with each output window to move windows between different workspaces |
2. Output Properties
View the Output Properties guide for more information.
The replay toolbar allows users to replay their Mission Plan after it has completed execution. Rotating of the camera, changing to a different type of Viewpoint, showing/hiding objects, and more are all supported while replaying a Mission Plan. The replay functionality is only available for the most recent workspace.

Replay Toolbar
From left to right:
•Adjust the playback speed by changing the numerical drop-down box or using the - or + buttons •Choose to play forward or backward •Jump to the first or last frame of the simulation, or click and drag the slider bar to navigate through frames •Input a specific epoch to jump to in the epoch text window •Use the buttons on the far right to step forward or backward by a single frame |
Note: If 20% of the maximum replay storage space is not available, then replay will automatically be disabled. See the Controls section of the User Preferences page for details.
Notes Screen
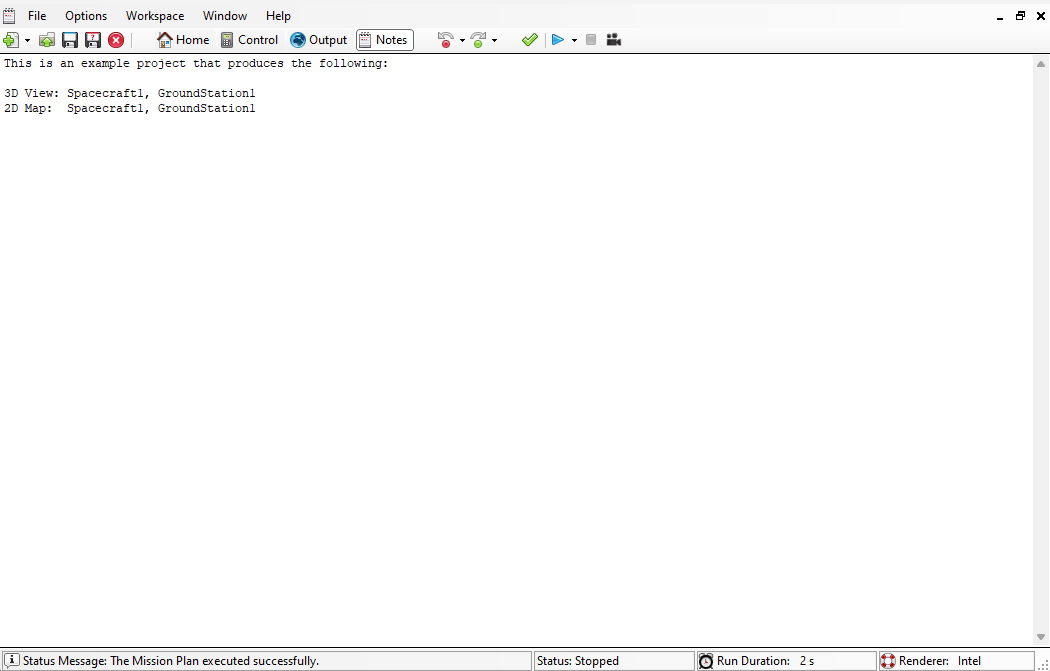
The Notes screen provides a space for you to capture notes and comments regarding the Mission Plan.

The FreeFlyer Notes Screen
See Also