This section will discuss how to navigate the various sections of FreeFlyer.
FreeFlyer has four main screens:
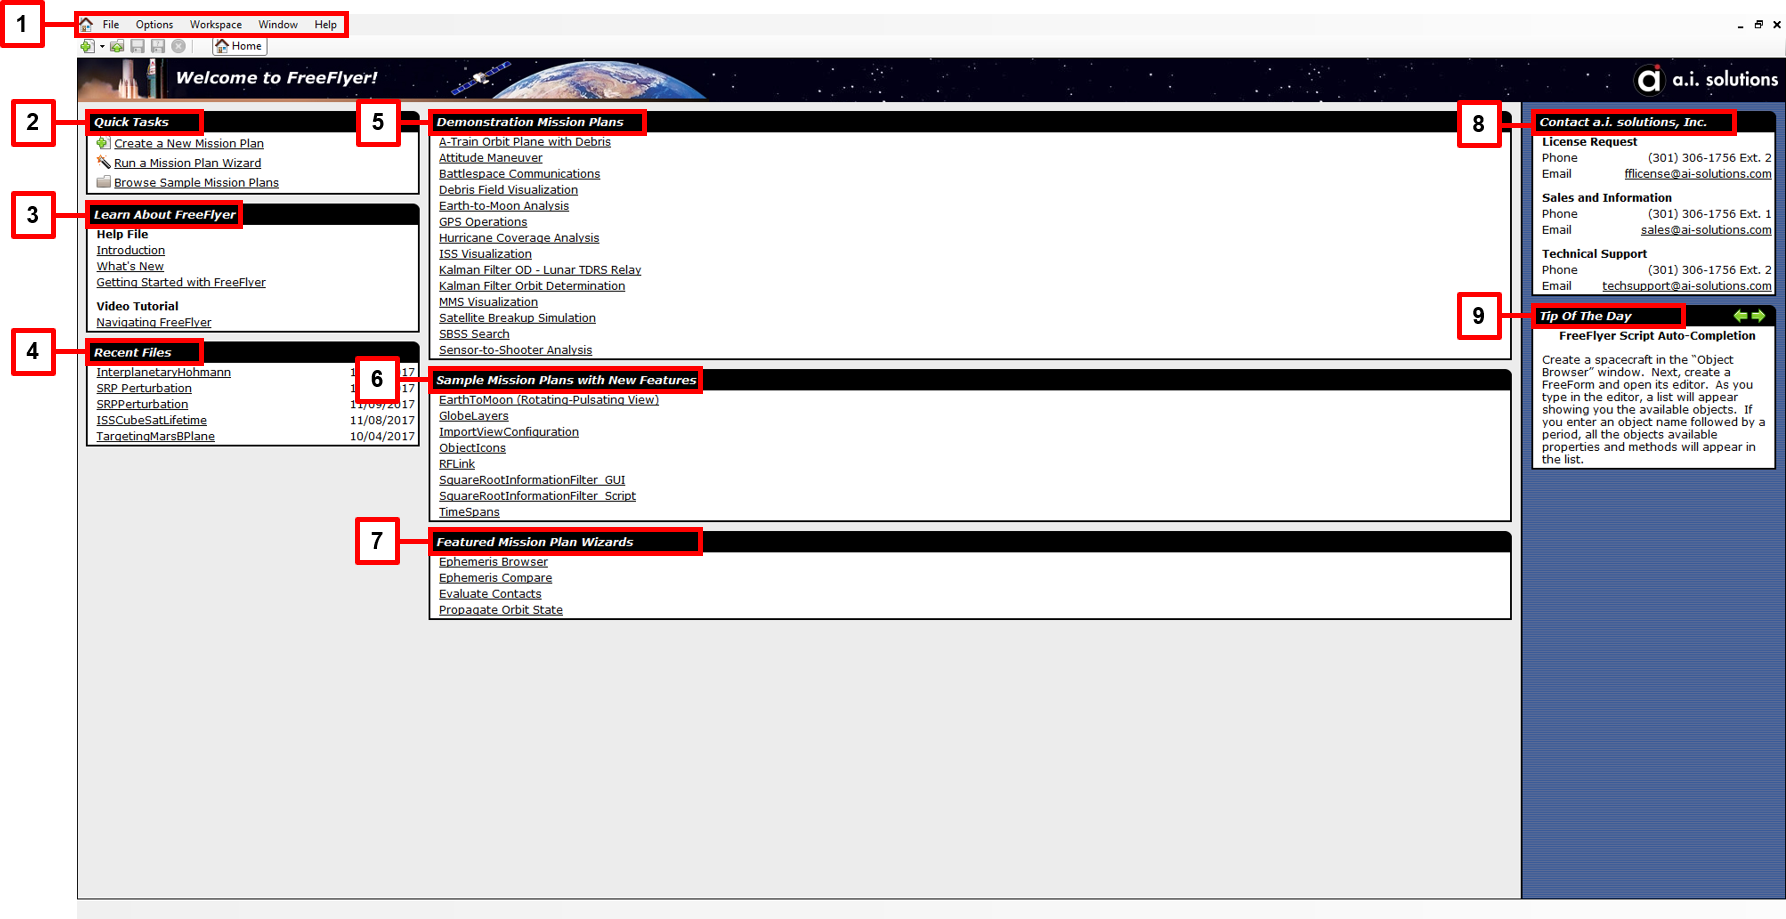
The Home Screen

The Home Screen
1.The Menu Bar
| Open, Close, and Save Mission Files as well as change user preferences, manipulate workspaces, and find help and documentation on questions you may have. |
2.Quick Tasks
| Create New Mission Plans, browse existing Sample Mission Plans, or use the Mission Plan Wizard to automatically generate a Mission Plan for simple analysis problems. |
3.Learn About FreeFlyer
| Read up on the added features of the latest update, and also view video tutorials. |
4.Recent Files
| Open recently modified Mission Plans. |
5.Demonstration Mission Plans
| Mission Plans that demonstrate FreeFlyer's advanced analysis capabilities. |
6.Sample Mission Plans with New Features
| Mission Plans that demonstrate the latest features added to FreeFlyer. |
7.Featured Mission Plan Wizards
| Initiates a ‘wizard’ which creates a Mission Plan to solve a simple analysis. |
8.Contact Information
| Contact information for the FreeFlyer team for license requests, sales information, and technical support. |
9.Tip of the Day
| Provides a random tip regarding a functionality of FreeFlyer. |
The Control Screen

The Control Screen
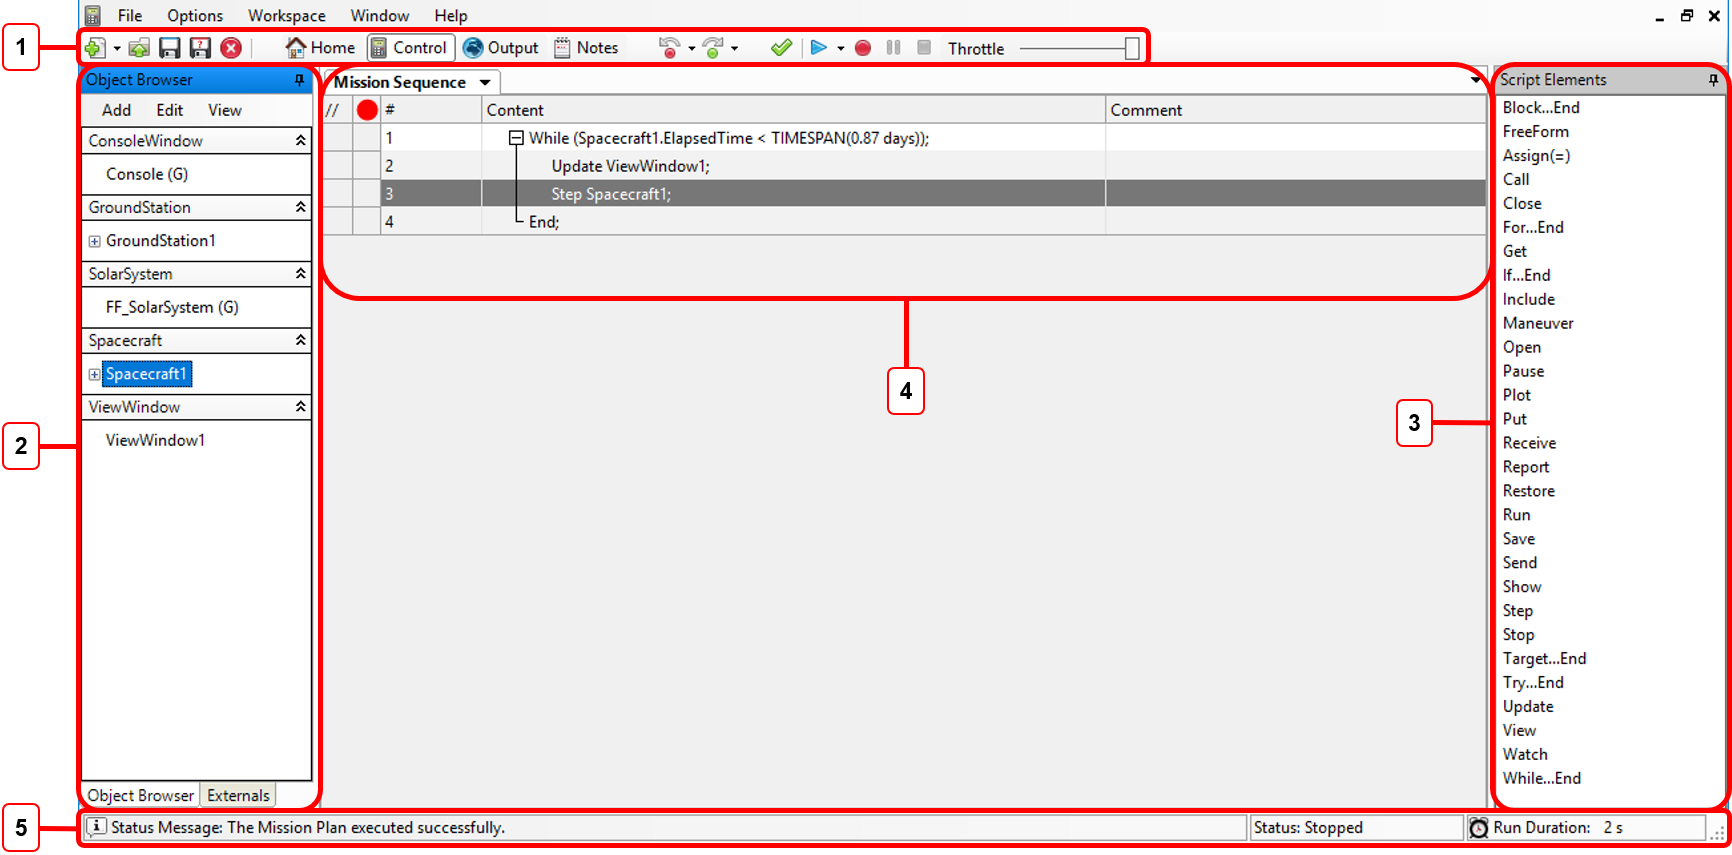
1.Navigation Bar
|
New Mission Plan (CTRL + N) |
|
Syntax Check (CTRL + Q) |
|
Open Mission Plan (CTRL + O) |
|
Run Mission (CTRL + R) |
|
Save, Save As (CTRL+S), (CTRL + SHIFT + S) |
|
Record Output |
|
Close Mission Plan (CTRL + SHIFT + C) |
|
Pause (CTRL + P) |
|
Undo (CTRL + U) |
|
Stop (CTRL + T) |
|
Redo (CTRL + R) |
|
|
![]() Controls the Speed of the Mission Plan Execution
Controls the Speed of the Mission Plan Execution
| NOTE: Mission Plans created using the "New Mission Plan" icon or CTRL + N will be created in nanosecond precision mode, which stores all time values to nanosecond-level precision. You can use the drop-down arrow next to the "New Mission Plan" icon to create a Mission Plan in millisecond precision mode instead, which will store all time values at millisecond-level precision. Nanosecond mode and millisecond mode use different syntax in many cases. This guide is written for nanosecond mode syntax, and we recommend that you create all Mission Plans in nanosecond mode by clicking the "New Mission Plan" icon or using the CTRL + N shortcut. |
2.Object Browser
| Add Objects to the Mission Plan and organize them by category. |
| NOTE: Objects created through a FreeForm script editor will not appear here. |
3.Script Elements
| List of all commands and flow control elements. You can drop and drag these onto the Mission Sequence, or directly into a FreeForm script editor. |
4.Mission Sequence
| The sequence of how the Mission Plan will run. You can comment out sections of code by clicking the “//” column next to the block you wish to comment out. Also, you can set breakpoints by clicking the red dot column next to the block you wish to set a breakpoint. |
5.Status Bar
| Shows the status of the mission as “Running”, “Paused”, “Stopped”, etc. Also displays the run duration of the Mission Plan execution. |
The Output Screen

The Output Screen
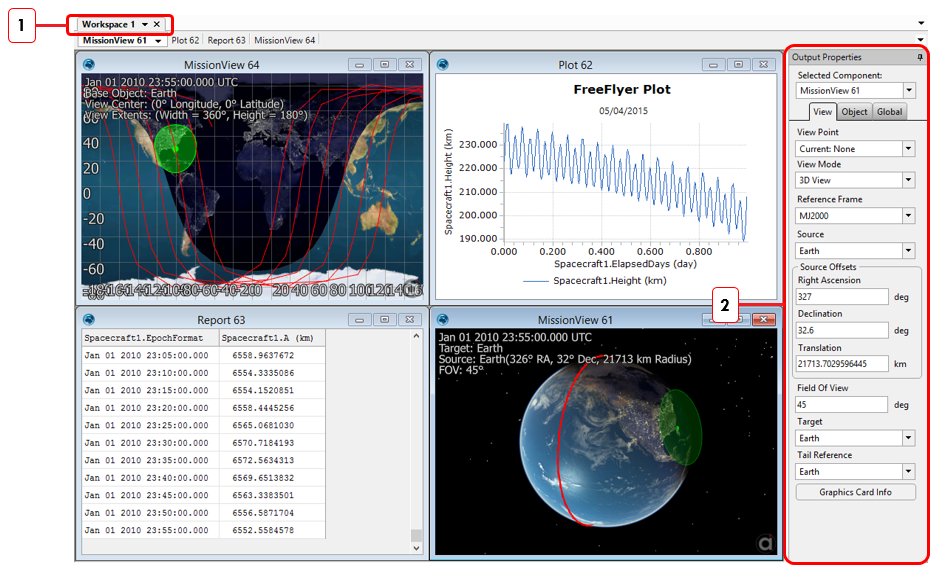
1.Workspace
| A new workspace will appear every time you run the Mission Plan. You can easily compare output by looking at different workspaces. |
2.Output Properties
| Contains modifiable properties of output windows (View Windows, Plot Windows, Map Windows, etc.) to help post-process data to include in presentations. |
The Notes Screen

The Notes Screen
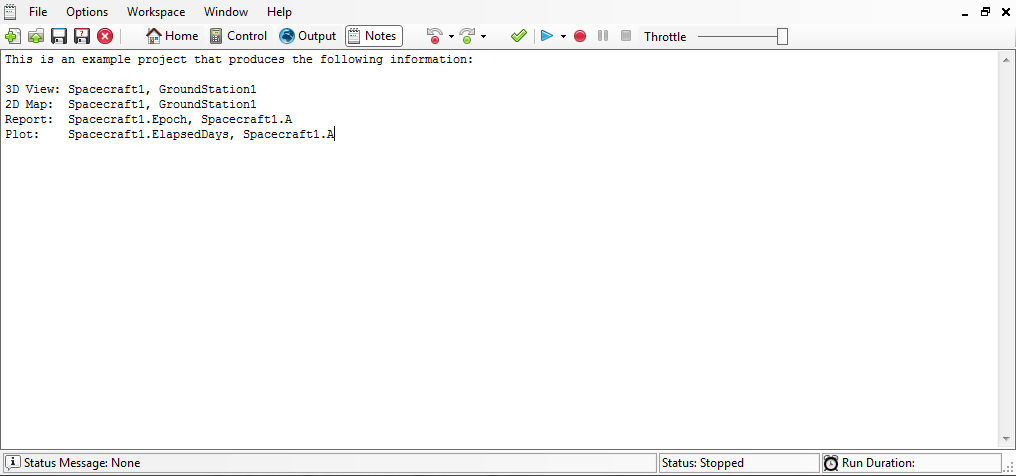
The Notes Screen provides a space for you to capture notes and comments regarding your Mission Plan